

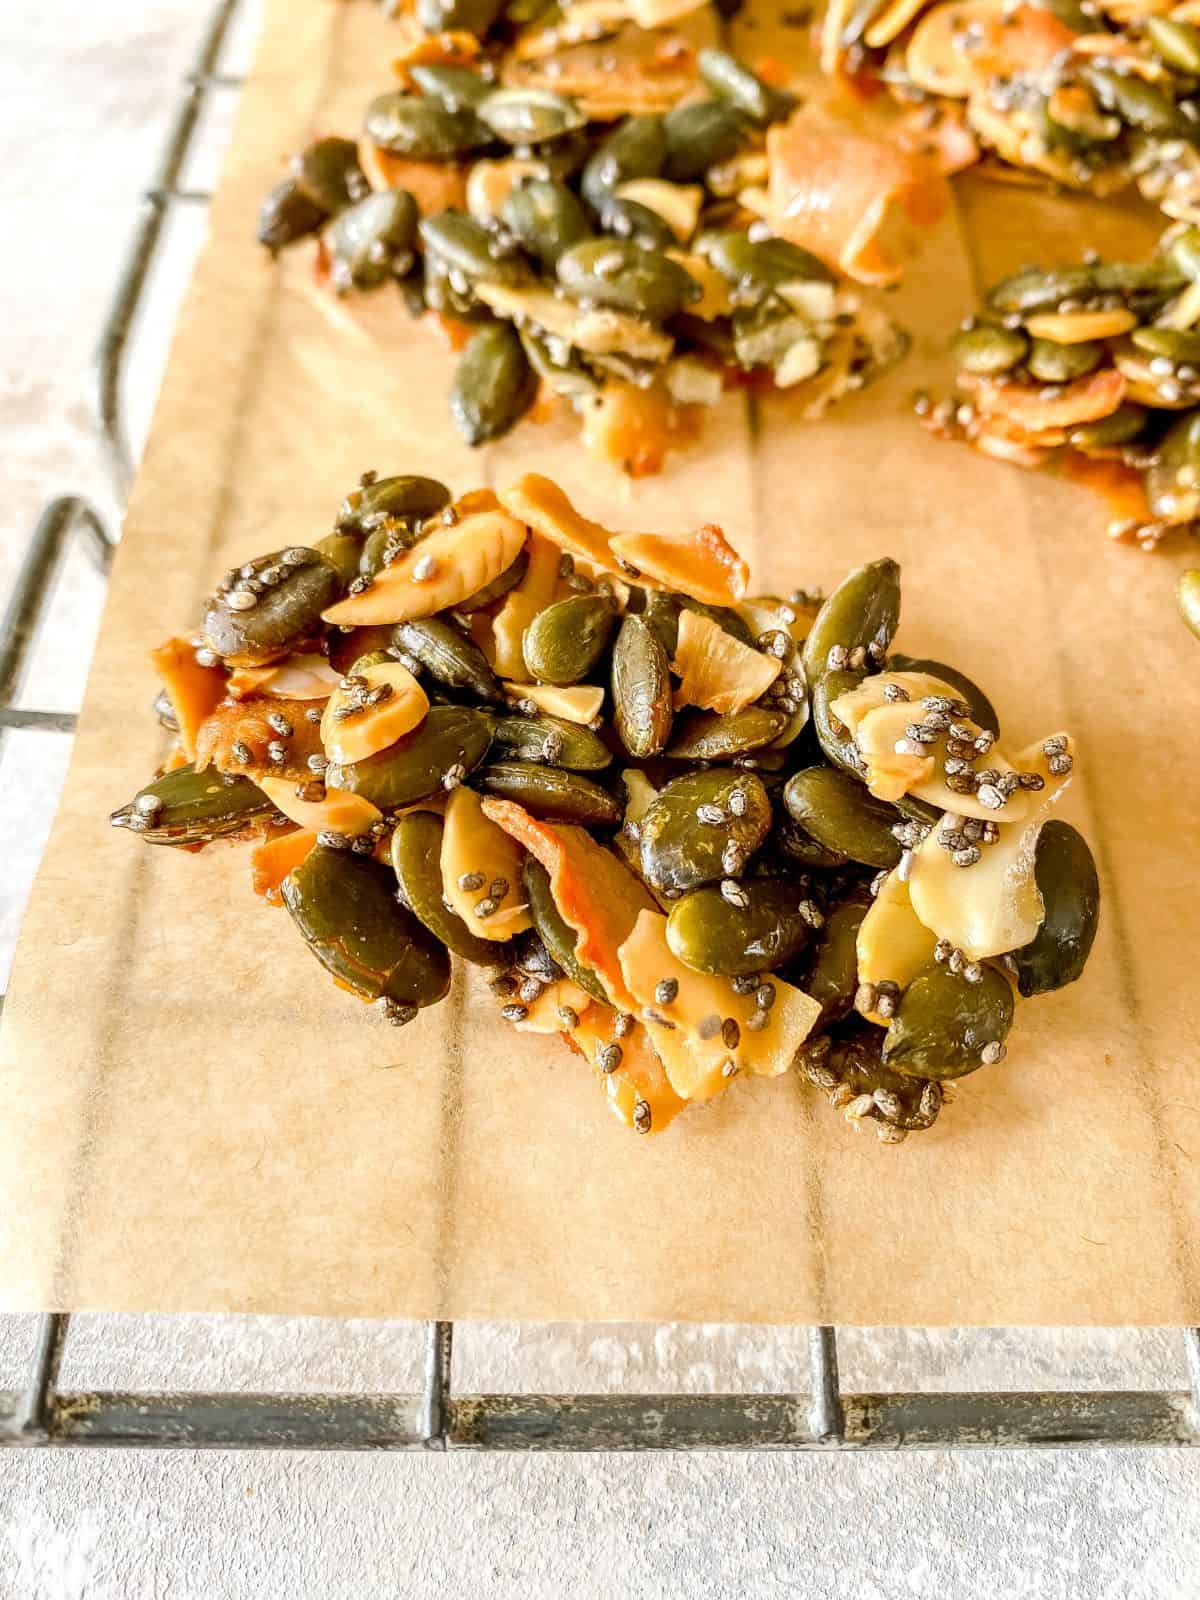
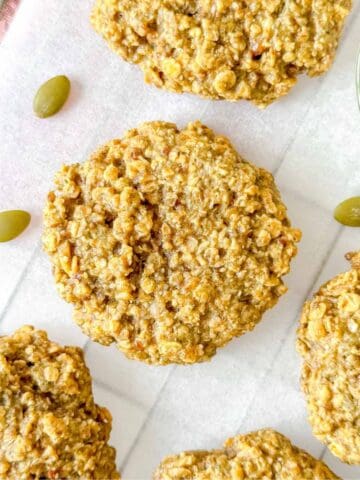
A fun and crunchy treat, these homemade pumpkin seed clusters are a sweet snack that adults and kids alike will love. Made with nuts, seeds, coconut and a hint of maple syrup for some decadent sweetness they come together in under 30 minutes. Perfect alternative to cookies if you fancy a change!
Now speaking of cookies . . . If you have a sweet tooth you may like to check out my cardamom oat cookies, pumpkin seed cookies and honey spelt cookies. I love making cookies and I think you will love them too!
And for another fun treat, my apple trail mix combines healthy fruit, nuts and seeds for a tasty snack that's quite healthy.
These vegan pumpkin seed clusters require mostly pantry staples and come together in around half an hour. They are such a tasty snack, and feel quite indulgent. Perfect for when the mid-afternoon sugar craving hits and they come together so quickly!
Jump to:
⭐ Why this recipe is so good
The best crunch. The nuts and seeds go perfectly crisp and crunchy, with a lovely sweetness.
Pantry staples snack! With minimal ingredients, and all pantry staples you won't need to run to the store for these seed and nut clusters.
Vegan and gluten free. The clusters are suitable for both dietary requirements, as well as being a low histamine snack.
Easy to make. Just a bit of 'hands on' time and then the oven does the work for you.
🌰 Ingredients
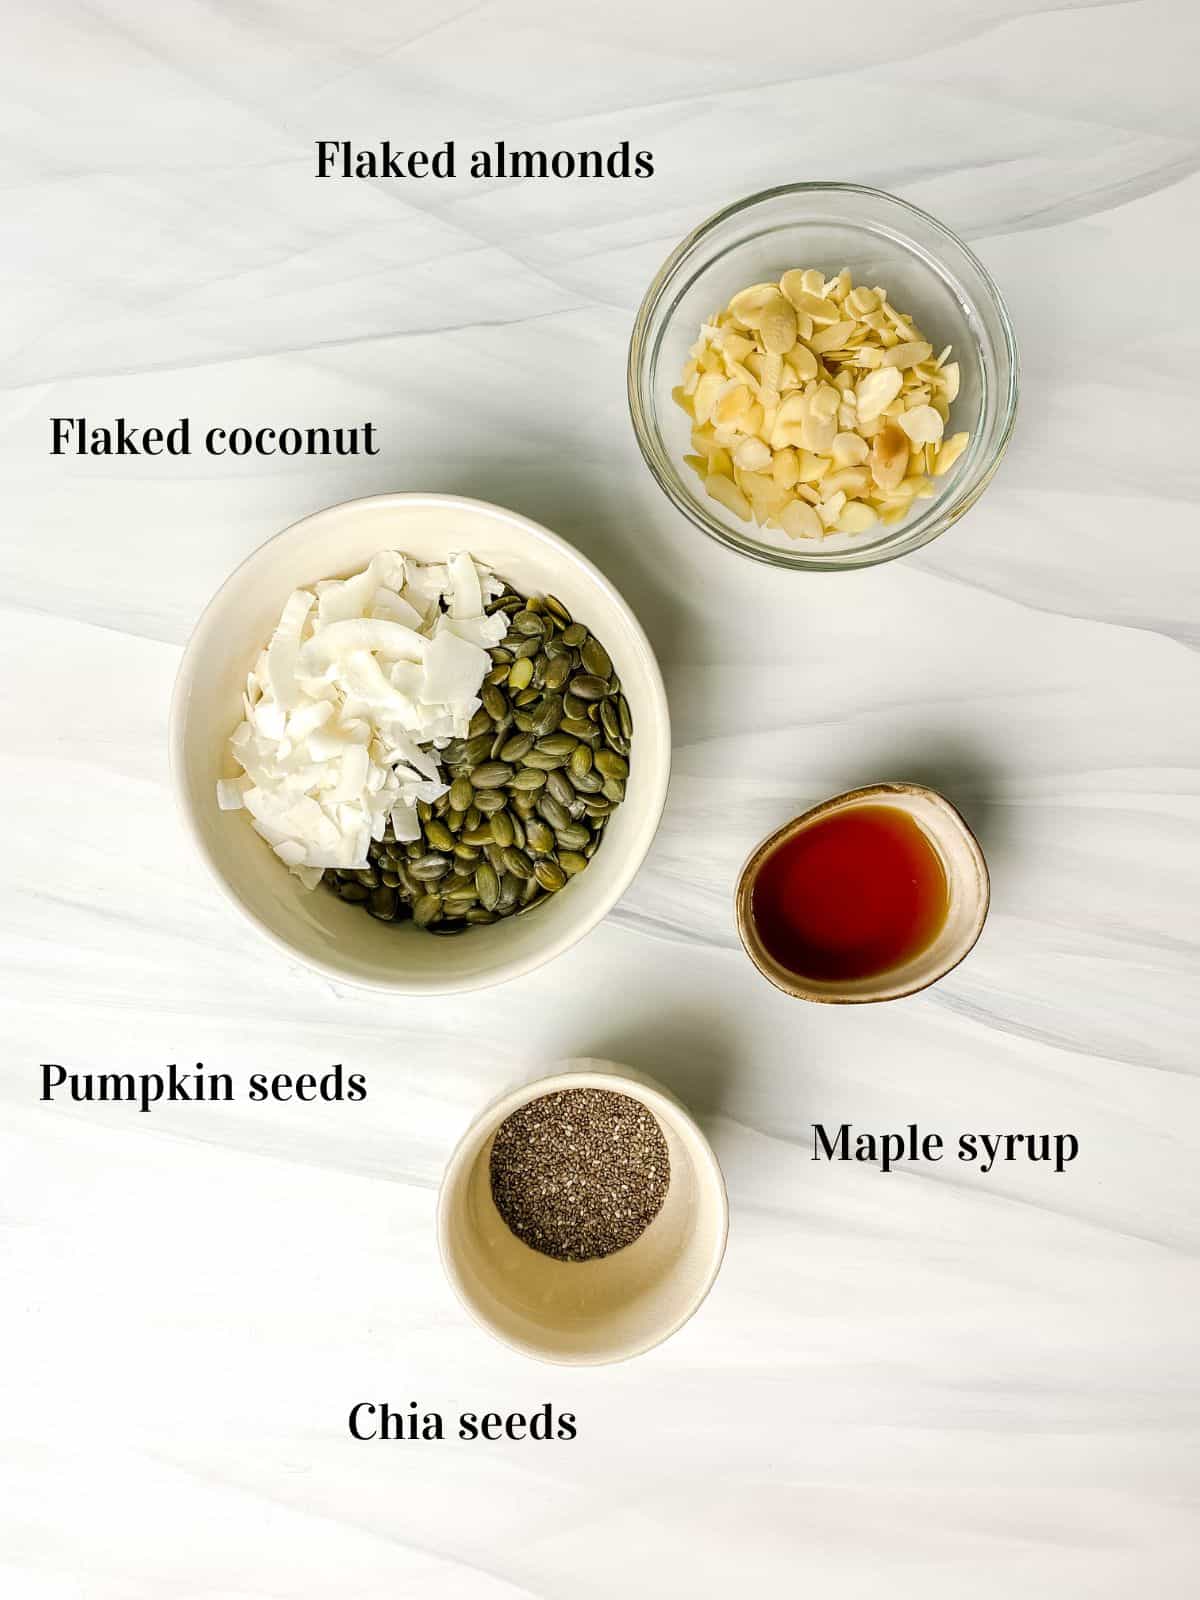
Make sure to see the recipe card below for the full ingredients and their quantities!
All you need for these clusters are nuts and seeds, maple syrup and a sprinkle of salt. Some notes on a few of the ingredients you will need:
- Pumpkin seeds - the main ingredient of these clusters. You want raw seeds, not those have been salted or roasted. The Terrasoul organic pumpkin seeds are good.
- Coconut - you want the dried coconut flakes not fresh coconut, which would be too wet.
- Chia seeds - these help to 'stick' the clusters together. You need the whole chia seeds, not milled chia. The Terrasoul organic chia seeds are good.
- Salt - personally I like to use pink Himalayan salt for a milder flavour than regular table salt.
🔪 Step by step instructions
Making these pumpkin seed clusters is very simple, with just a few steps:
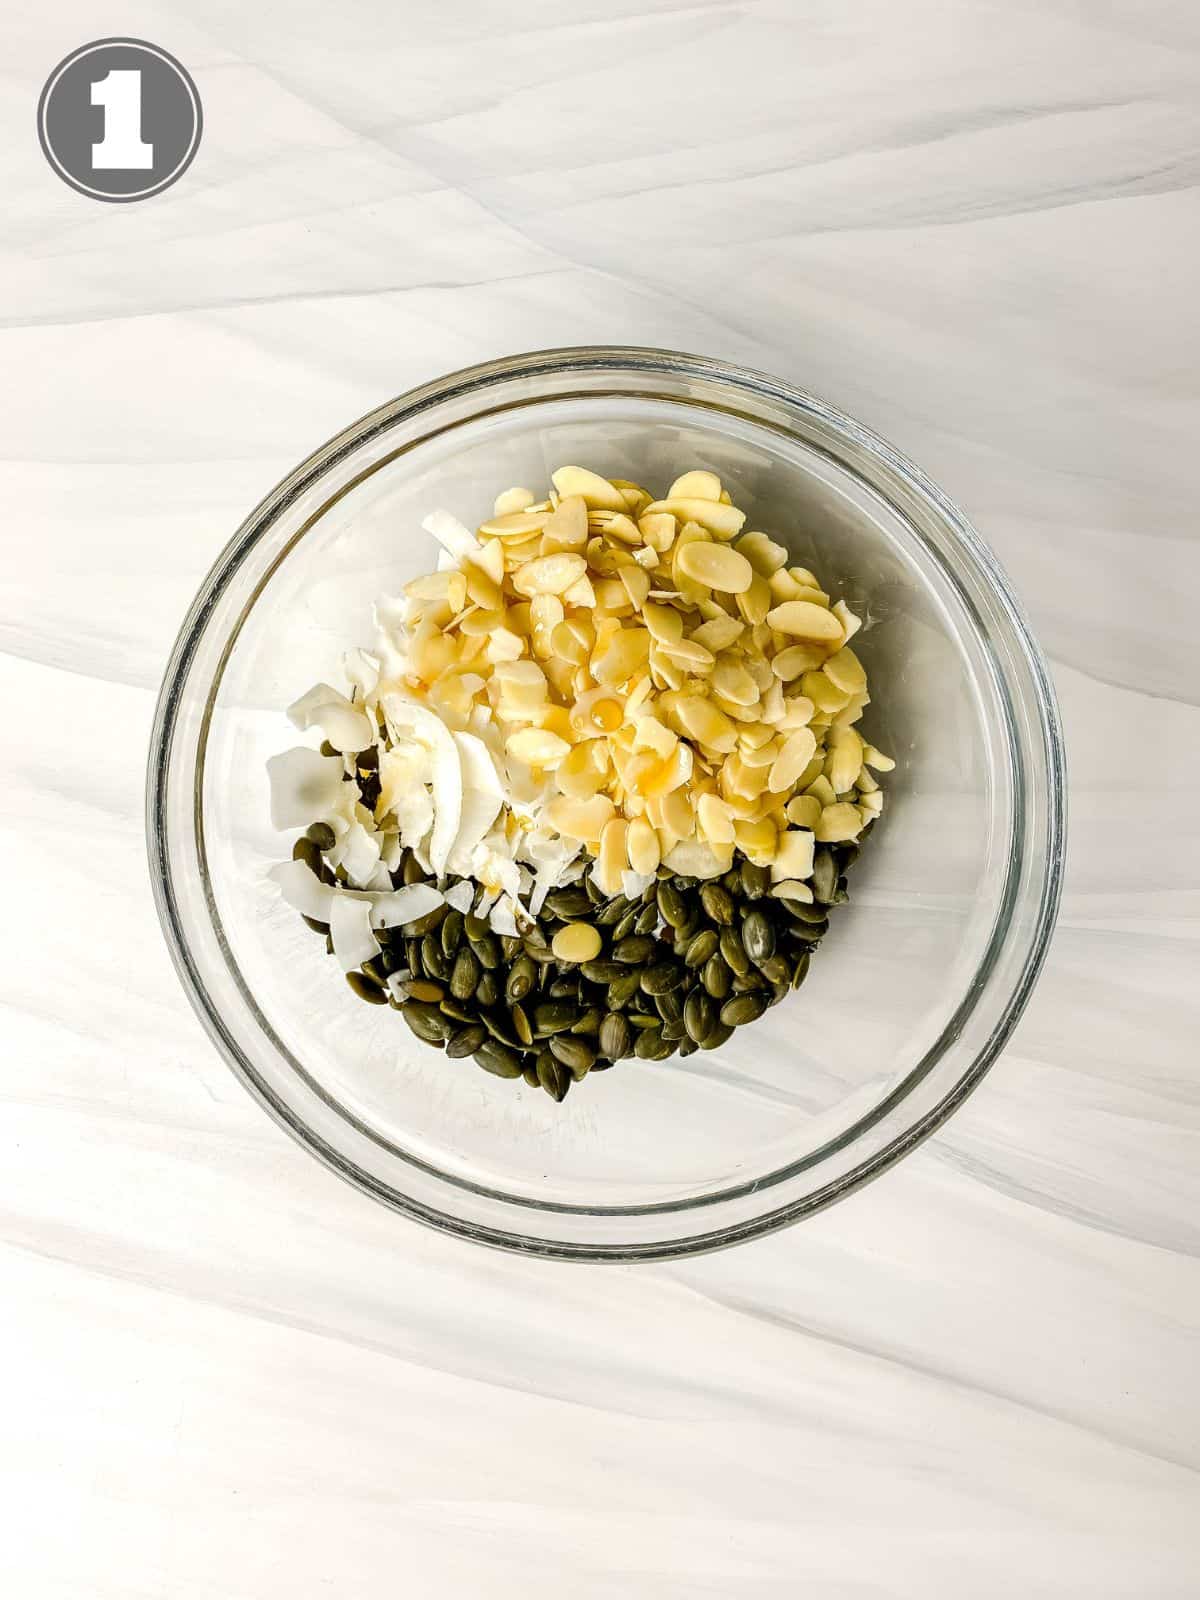
Step 1
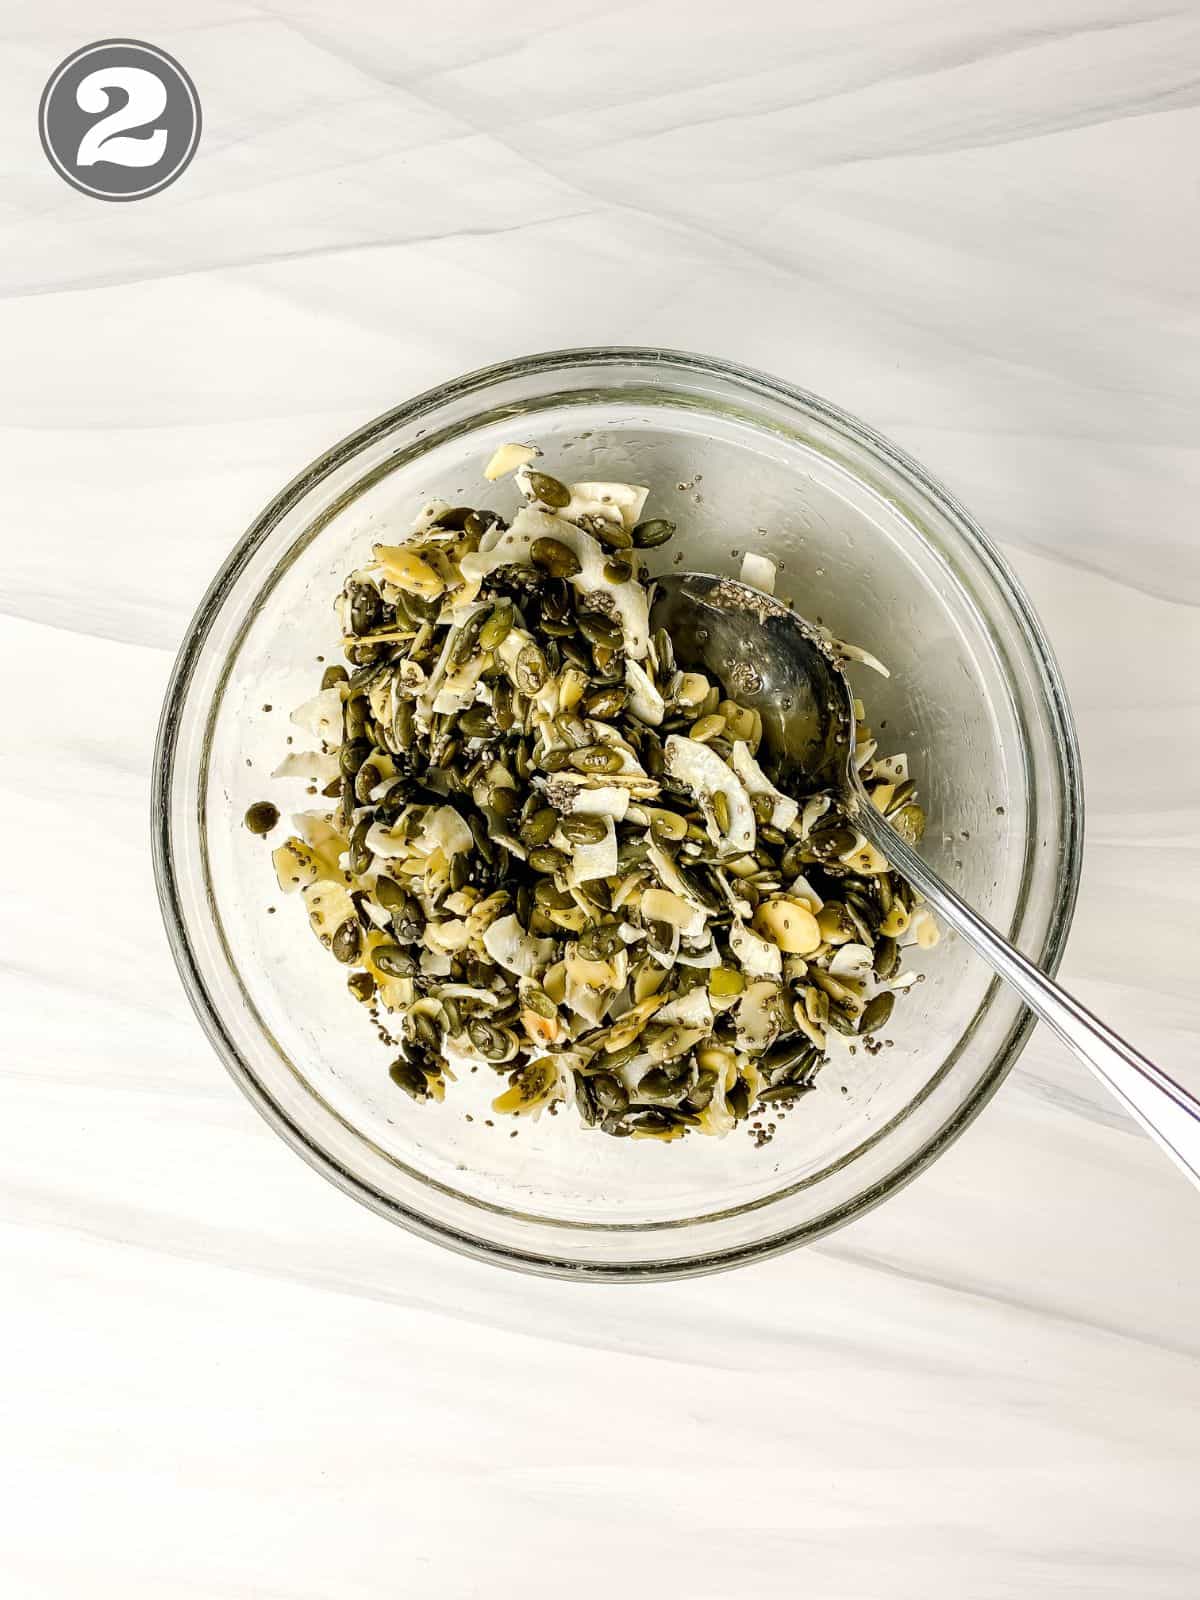
Add the seeds, nuts, coconut flakes and salt to the bowl, then drizzle on the maple syrup (image 1). Stir very thoroughly so that the maple syrup coats all the nuts and seeds (image 2).
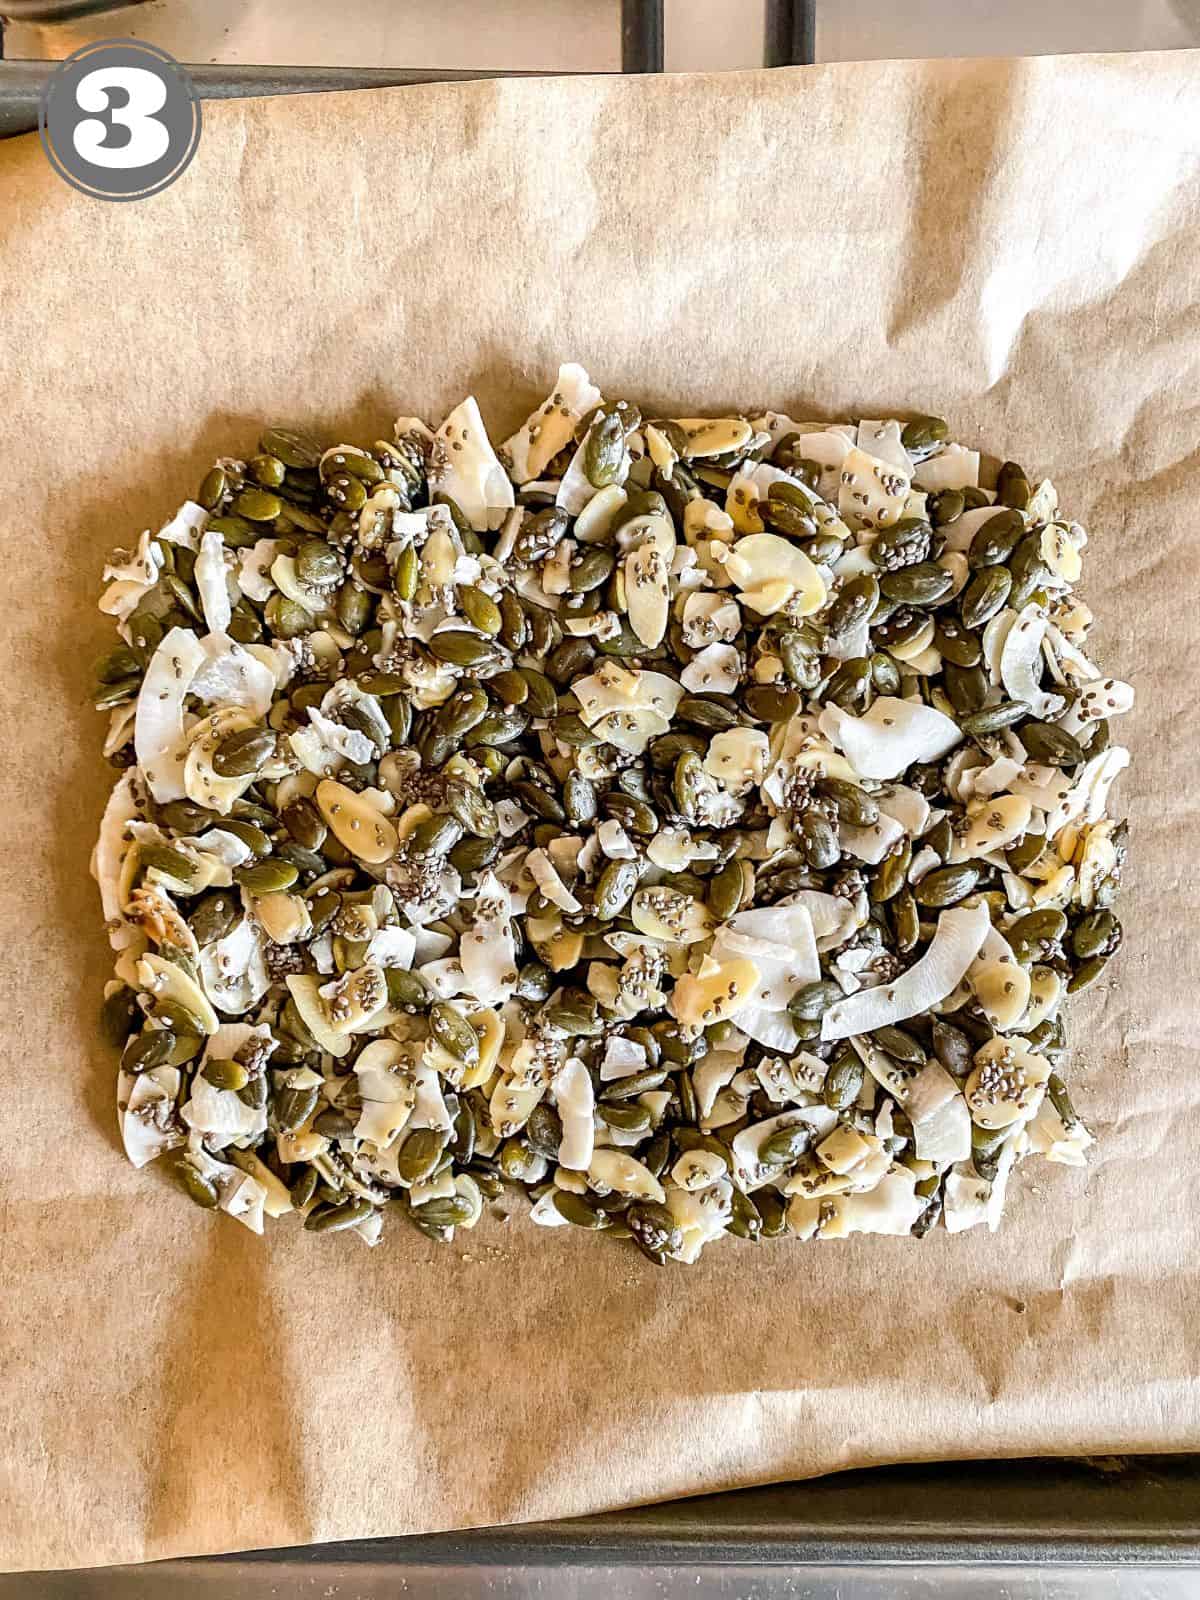
Step 2
Spread the mixture onto a lined baking tray so that there is a thin layer (about 0.5cm thick), with no gaps (image 3). Bake the mixture on the bottom of the oven for 20 minutes (watch for any signs of burning in the last few minutes).
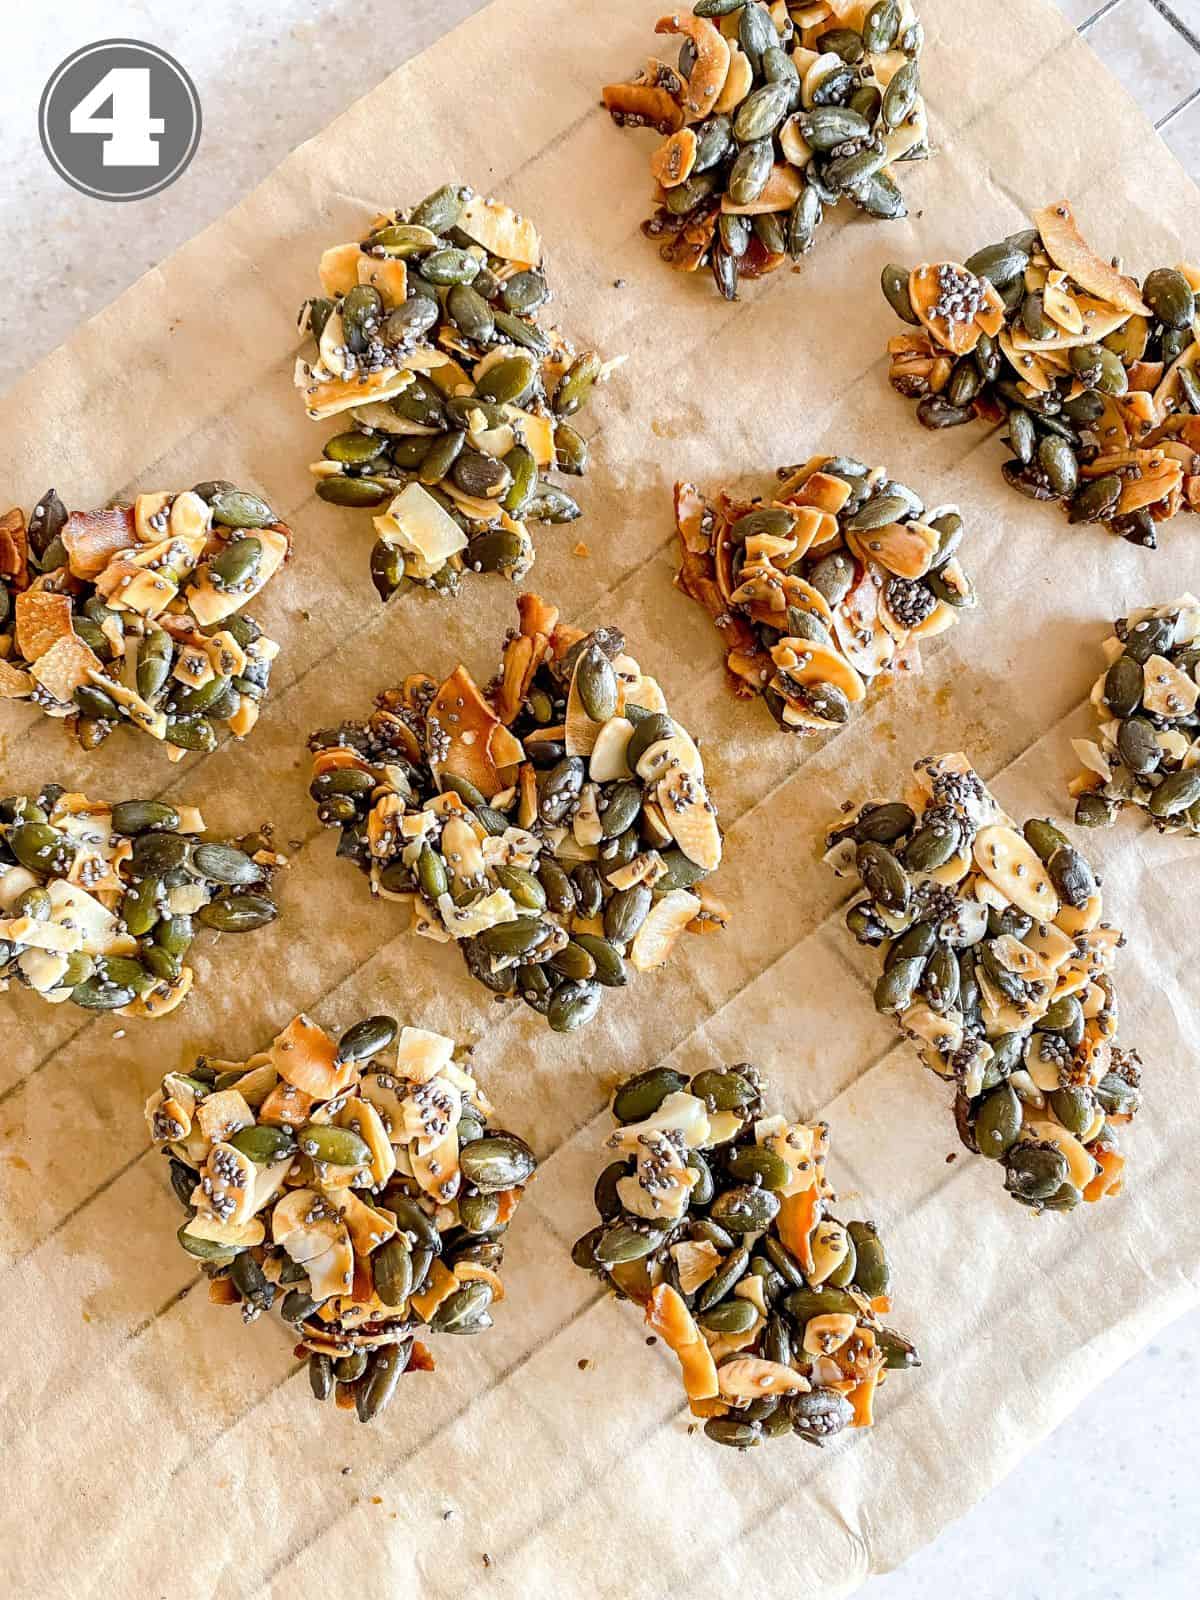
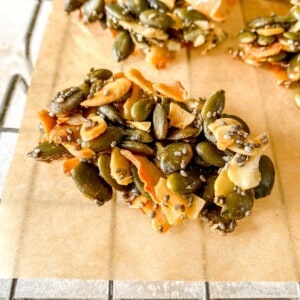
Step 3
Once the mixture has cooled, carefully break into clusters of the size of your choice (image 4).
💭 Recipe tips and notes
- Stir the mixture very thoroughly so all the nuts and seeds are coated in the maple syrup.
- Be sure to have the cluster mixture in a fairly even layer on the baking tray so it bakes evenly.
- Make sure to place the mixture at the bottom of the oven, not the top or middle as that would be too hot.
- Watch the mixture towards the end of cook time for any signs of burning. It can turn fast!
- Allow the mixture to cool thoroughly before trying to break into clusters. It will solidify as it cools and won't 'crack' into small pieces before that.
🥣 Equipment needed
Baking tray and parchment paper - to bake the clusters.
Wire rack - to allow the pumpkin seed crunch clusters to cool before breaking into pieces.
Bowl - to combine the nuts, seeds and maple syrup.
🍽 More fun and tasty snacks
Love sweet treats? You will find lots to choose from on my snacks page, including fun ideas such as my coconut macadamia nut cookies and apple trail mix. Some other tasty recipes:
I’m always in the kitchen, so come join me on Instagram, Facebook and Pinterest to be the first to hear of new recipes! And please do leave a star rating ⭐ if you've tried the recipe!
📖 Recipe
Pumpkin Seed Clusters
Equipment
- Small bowl
Ingredients
- ½ cup pumpkin seeds
- ¼ cup coconut flakes (dried coconut not fresh)
- ¼ cup flaked almonds
- 1 tablespoon chia seeds
- 2 tablespoon maple syrup
- sprinkle salt
Instructions
- Preheat the oven to 170C / 340F and line a baking tray with parchment paper.
- Add the seeds, nuts, coconut flakes and salt to the bowl, then drizzle on the maple syrup. Stir very thoroughly so that the maple syrup coats all the ingredients.
- Spread the mixture onto the parchment paper so that there is a thin layer (about 0.5cm thick), with no gaps. Bake the mixture on the bottom of the oven for 20 minutes (watch for any signs of burning in the last few minutes). Take out of the oven and don't touch it! The mixture will solidify as it cools and stick together.
- Once the mixture has cooled, carefully break into clusters of the size of your choice. This is a delicate process so approach with care!
- Serve immediately or store in a sealed container. Enjoy!
Notes
- Stir very thoroughly so the maple syrup coats all the nuts and seeds.
- Watch the oven towards the end of cook time, as the clusters can burn easily.
- Allow the mixture to cool before handling or breaking into the clusters. The clusters are rather fragile, so handle with care! But even if they break a little they are still delicious! You could even use any broken bits as a topping for other sweet treats.
- Nutritional information is auto-generated and should be understood to be an estimate.
Swiss Interest Group Histamine Intolerance
All ingredients score a '0' on the SIGHI list, with the exception of:- almonds and coconut score a '1' - change up for more pumpkin seeds or other nuts or seeds if you are unable to tolerate.

Judi says
These are great! I don’t like coconut so subbed another 1/4 cup flaked almonds. I also pressed in a couple of Tablespoons of dark chocolate chips before baking. Thanks for a great recipe!
Claire says
Lovely to hear that you enjoyed them Judi!
Jill says
Easy and delicious, thanks!
Claire says
So glad you enjoyed them!
Diana says
Love these
Claire says
Lovely to hear you enjoy them!
Becca Arguijo says
This is sooo easy and quick to make. Very delicious. My family loves it. Everybody is asking for more. I added a scoop of pumpkin protein powder too. I double the recipe these days!!Thank you
Claire says
So lovely to hear that all the family enjoys the nut clusters Becca!
Melissa says
Such a yummy, satisfying treat regardless of dietary restrictions but a huge plus to have something so tasty to snack on when options are so limited for health reasons 🙂
Claire says
Lovely to hear that you enjoy the seed clusters Melissa!
mary says
could you use honey instead of syrup do you think?
Claire says
I haven't tried it myself, but it should work fine.
Monica says
Can you use unsweetened shredded coconut instead of coconut flakes?
Claire says
I haven't tried it myself, but I don't see why it wouldn't work fine. Make sure they are dry and not wet at all.
Amanda says
We tried it tonight and unsweetened coconut worked very well. Also added about I have a tablespoon of ground flaxseed. Very good!
Claire says
So glad you enjoyed them Amanda!
Teresa Flynn says
Can you add dark chocolate chips to this recipe? Thanks
Claire says
Hi Teresa, I haven't tried it myself and you wouldn't be able to bake them with regular chocolate chips as they would melt in the oven. It may work with cooking chocolate, so let me know how it works out!
Ashley says
Hi, Claire. Thanks for sharing this simple recipe. I follow the recipe to make the crunch’s, everyone likes. I am thinking of making it for Christmas treat bags. The only thing I need to ask is how to keep the crunches dry because I found out that the crunches would start getting wet if I don’t finish them in three days. Is there any trick or suggestion? Have a great day!
Claire says
Hi Ashley! So glad you all like the clusters and that's such a fun idea to make them for treat bags! As they don't use preservatives, they do need to be eaten within a day or two I'm afraid. It's all fresh pantry staples so they will start to go a bit soggy and won't keep their crunch. Have a great day too!
Margaret Cachia says
I followed all you said and it all stuck to the baking paper next time I’ll oil the dish and paper. Not enjoying eating paper.
Claire says
Hi Margaret, thank you for taking the time to comment. Sorry they stuck to the parchment paper, it hasn't happened when I have made them and it's usually made to be non-stick. I hope they work well if you oil the paper.
Jana says
This recipe looked really simple, well it is haha, but I just didn't expect much from it but gosh was I wrong. This is the best snack ever! My family/friends absolutely love it too. It's so easy to make and so delicious, thank you so much for sharing this recipe 😊
throughthefibrofog says
Hi Jana, I'm so happy you liked the recipe! So simple isn't it, but perfect as a treat. Thanks so much for taking the time to leave a comment, so kind of you 🙂
Louise says
I just love this recipe. It is my favourite at the moment.
I follow the recipe exactly and the result is perfect! Scrumptious!
Claire says
Lovely to hear that you enjoy the nut clusters Louise!
Katie Clark says
Going to try this. I need snacks that are dairy and gluten free. These fit the bill.
J says
Hi. I tried this with fresh coconut and mine didn’t get crispy. Did I do something wrong? I’m so disappointed
throughthefibrofog says
Hi, sorry to hear that it didn't work with fresh coconut. It is probably too wet to get crispy. The recipe is best with dried coconut flakes and that is what I always use. Sorry if that wasn't clear in the recipe notes, I will amend them. Hope you get to make them soon!